How to increase an EBS volume size
The Premise
You’ve set up a new EC2 instance and allocated a fixed amount of space in your EBS.
The Issue
However after using your instance you realise you need to increase the EBS volume size.
The Solution
It is possible increase the EBS Volume size without having to stop your instance but there are a few steps to achieve this.
To best solve this I’ll break it down into three sections:
- What is an EBS Volume?
- How do you attached an EBS Volume?
- How do you increase the Volume size?
1. What is an EBS Volume?
When you launch an EC2 instance, you will most likely opt for an EBS based storage solution.
EBS stands for Elastic Block Store and is a filesystem that is attached to your EC2 instance to provide file storage.
EBS is tightly integrated with your EC2 instance, offers high performance, low latency storage with the 5 9’s of availability (99.999%).
EBS is what gives your EC2 instance persistent storage. This being that when you stop your instance, the EBS will still store your data such that when you spin up an instance again, it will re-attach the stored EBS volume and you will be able to access the stored data again.
EBS is also great for creating backups as you can create snapshots of your EBS Volumes and store this in S3.
2. How do you attached an EBS Volume?
When you set up a new EC2 instance, you will be presented with the option to add storage to your EC2 instance:
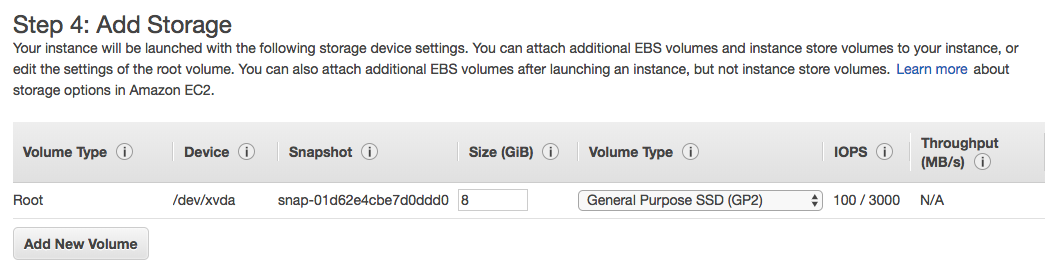
This will generate an EBS Volume with the name /dev/xvda which will be attached to your EC2 instance.
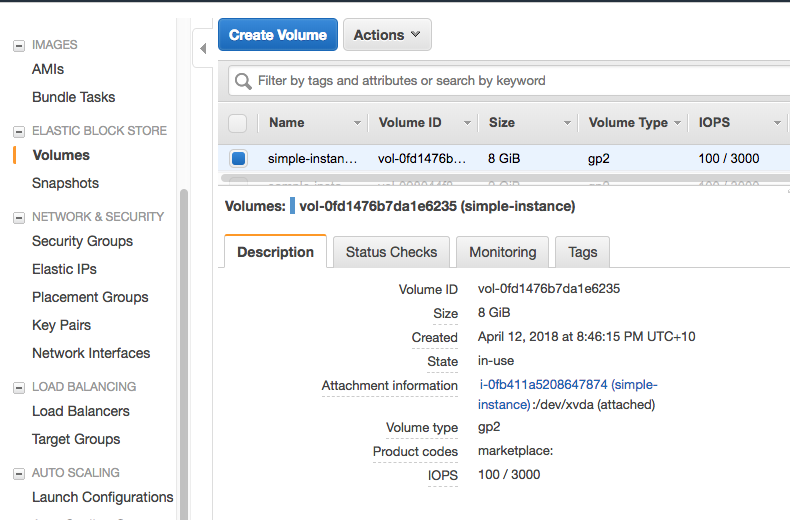
Once an EC2 instance starts spinning up, you can see the EBS Volume in EC2 > Elastic Block Storage > Volumes
3. How do you increase the Volume size?
To modify the volume size, select the EBS Volume and select Action > Modify Volume.

Change the volume size to somthing larger (I’m using 16 GB inthis example) and click Modify then Yes.
Though you have increased the size, this will have no effect until you extend the filesystem to take advantage of this new storage space.
To achieve this, ssh into your intance and type df -T:

This shows us that the filesystem has 8 GB of space, however we know it should have 16 GB.
To fix this, we need to do two things:
- Expand the partition
- Expand the filesystem
To expand the partition, we can use the growpart command:
sudo growpart /dev/xvda 1
Take note of the syntax, namely the space between xvda and 1.

To check this, run lsblk

Notice that the partition is now 16GB but if you run df -T, the filesystem can still only extend to 8GB.
Now we need to expand the filesystem to fit the resized partition.
It is worth noting what Type the filesystem is, as different filesystems have different methods. This tutorial will only cover Linux ext2, ext3, or ext4 filesystem types.
By looking at our df -T output from above we can see that our EBS has the type ext4. From this we can use the command:
sudo resize2fs /dev/xvda1

Now the filesystem is extended too, which we can check via df -T

And voila!!!
We have extended the size of our EBS Volume, Partition and Filesystem!!!
—
Disclaimer
This post is in part an attempt for me to start writing blog posts. However it is also to help me consolidate the steps I took such that I can refer back to it in the future. Due to this, if I have skipped over som vital steps or rambled in other parts and you wish for additional information, feel free to contact me and I’ll update this post accordingly.