Code Pipeline with jekyll
The Premise
Recently I rebuilt my personal website but this time I used Jekyll as my static site generator as I wanted to add blogging but didn’t want to send any money on hosting a CMS/DB etc etc.
GitHub offers an amazing feature called GitHub Pages which compiles and hosts your Jekyll sites for you. Additionally with its Continuous Deployment support, it will recompile/deploy your site after every git push. What is not to love?
The Issue
Though Github offers this service, they only support a fixed number of plugins. That’s a nice list and everything but I want tagging on my blog! And who knows, maybe a million other little things outside those supported plugins.
Well, * cracks knuckles *, I can fix this.
The Solution
I’m a big fan of AWS and have be finding myself using it more and more to help solve my technical problems. So with that in mind, this is what I set out to build:
- Jekyll static site with blog/tagging feature - source code stored in GitHub
- Static site will sit in an AWS S3 bucket configured for Static website hosting
- use AWS Code Pipeline to rebuild and deploy the site after each commit to GitHub.
Seems straightforward enough. But let’s break each part down.
Step 1 - Jekyll Site Theme
I didn’t spend too much time with Jekyll to be honest. For the Jekyll site I picked from one of the many Jekyll themes, cloned it to my own repo in GitHub and made the relevant content changes. This is the theme that I used if anyone is interested.
After this, I plugged in Jekyll tagging, messed around with the site structure and then it was ready!
Step 2 - Hosting on S3
For those not familiar, AWS S3 is a simple cloud storage service which is incredibly durable, you can read more about AWS S3 durability here and comparatively very cheap to store you assets on. I’m going to skip over the exact method I used to set up the bucket, configuring Route 53, set up an email component and the initial deploy via the terminal as it is beyond the scope of this post but feel free to contact me if you want to know what I did.
Step 3 - Setting up Code Pipeline and Code Deploy
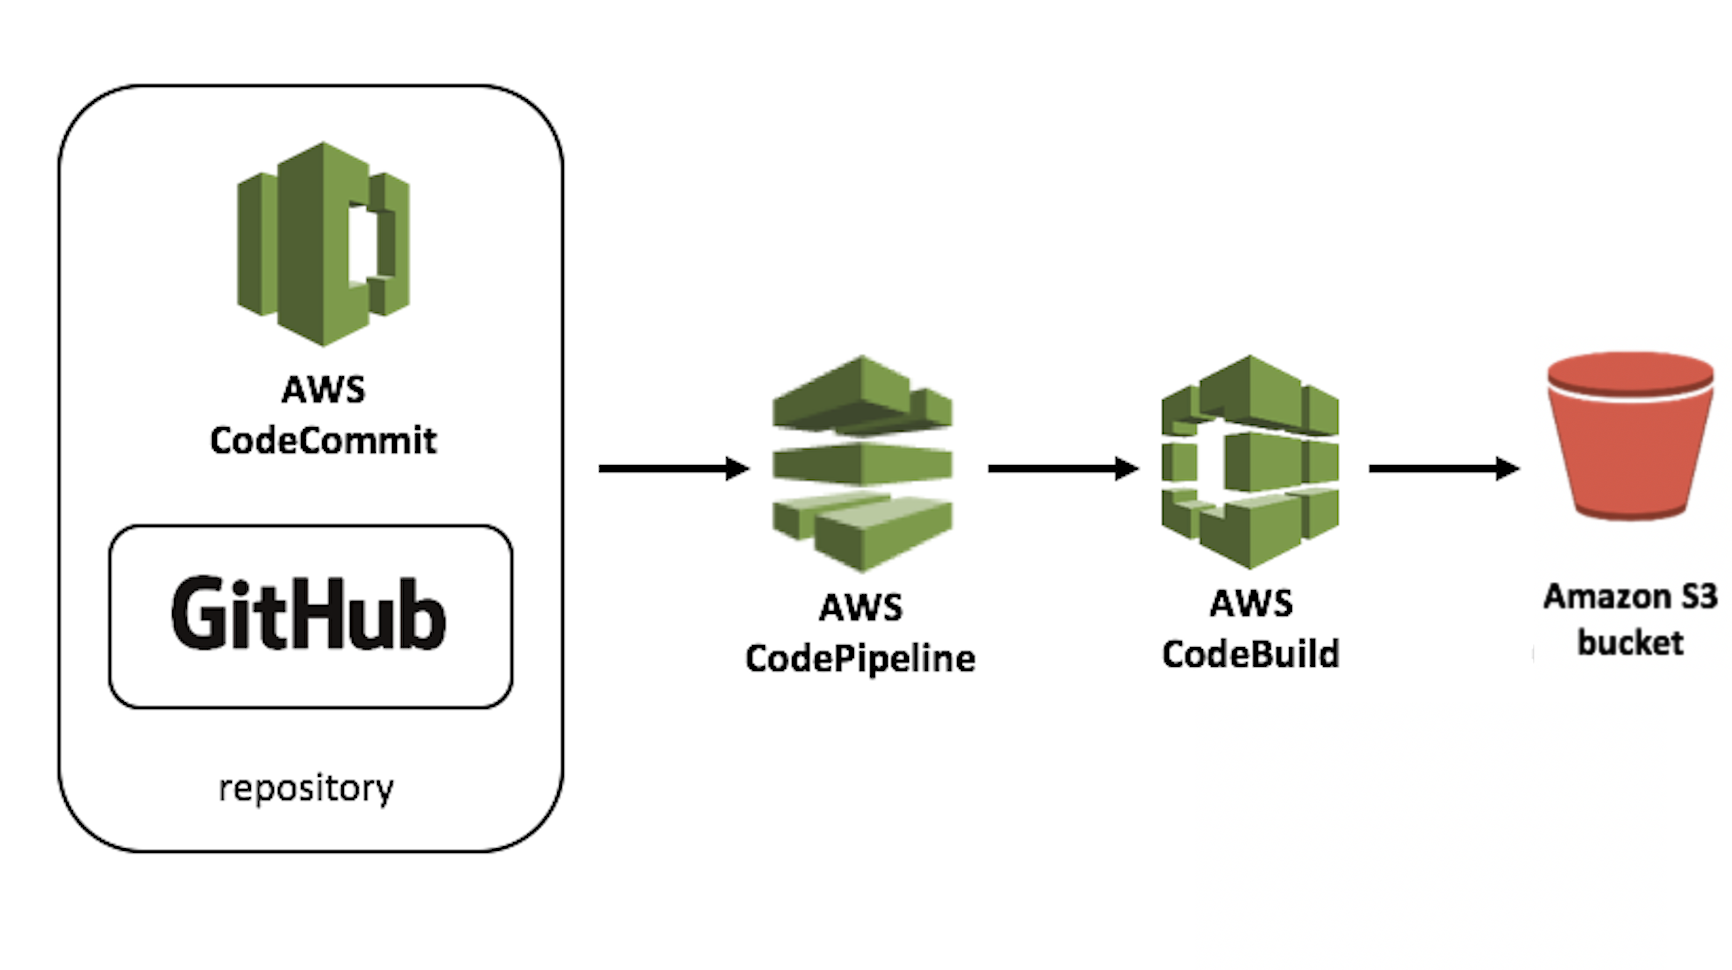
The image above is a basic overview of what I wanted to achieve which is relatively straight forward. The below is a series of screenshots about how I set this up.
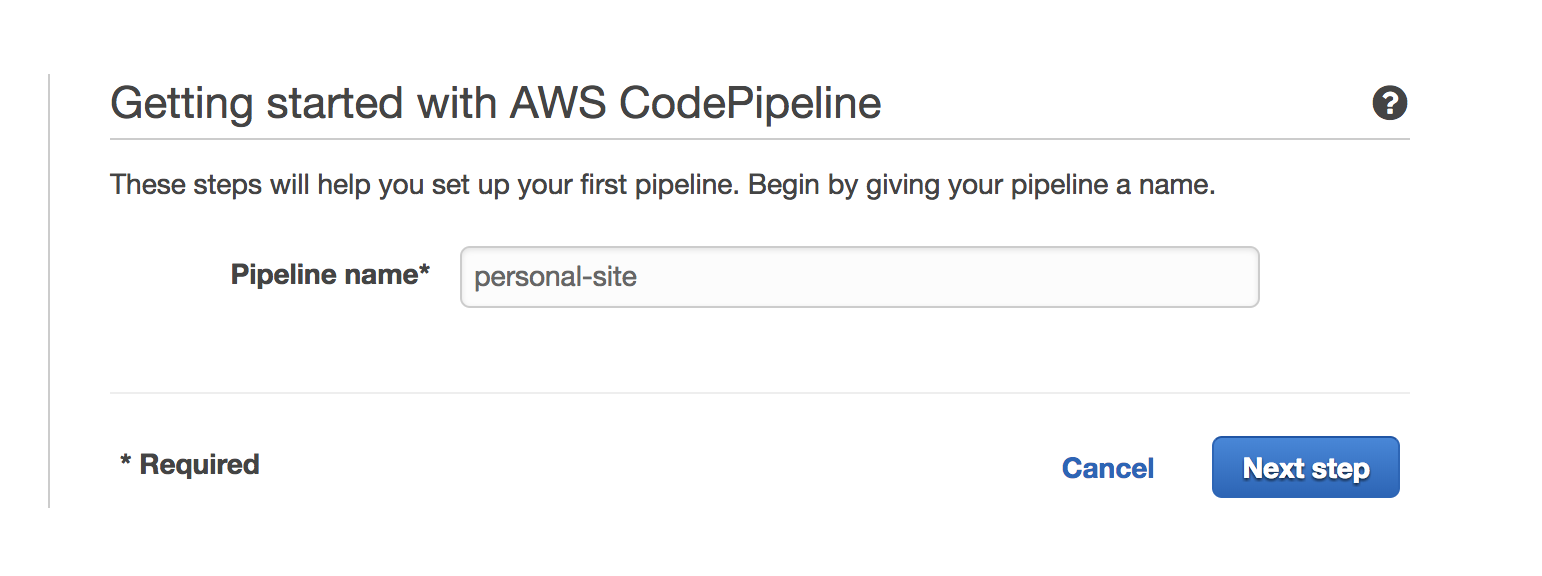
3.1 Create a Pipeline
In AWS’s CodePipeline, click Create pipeline and give the pipeline a name
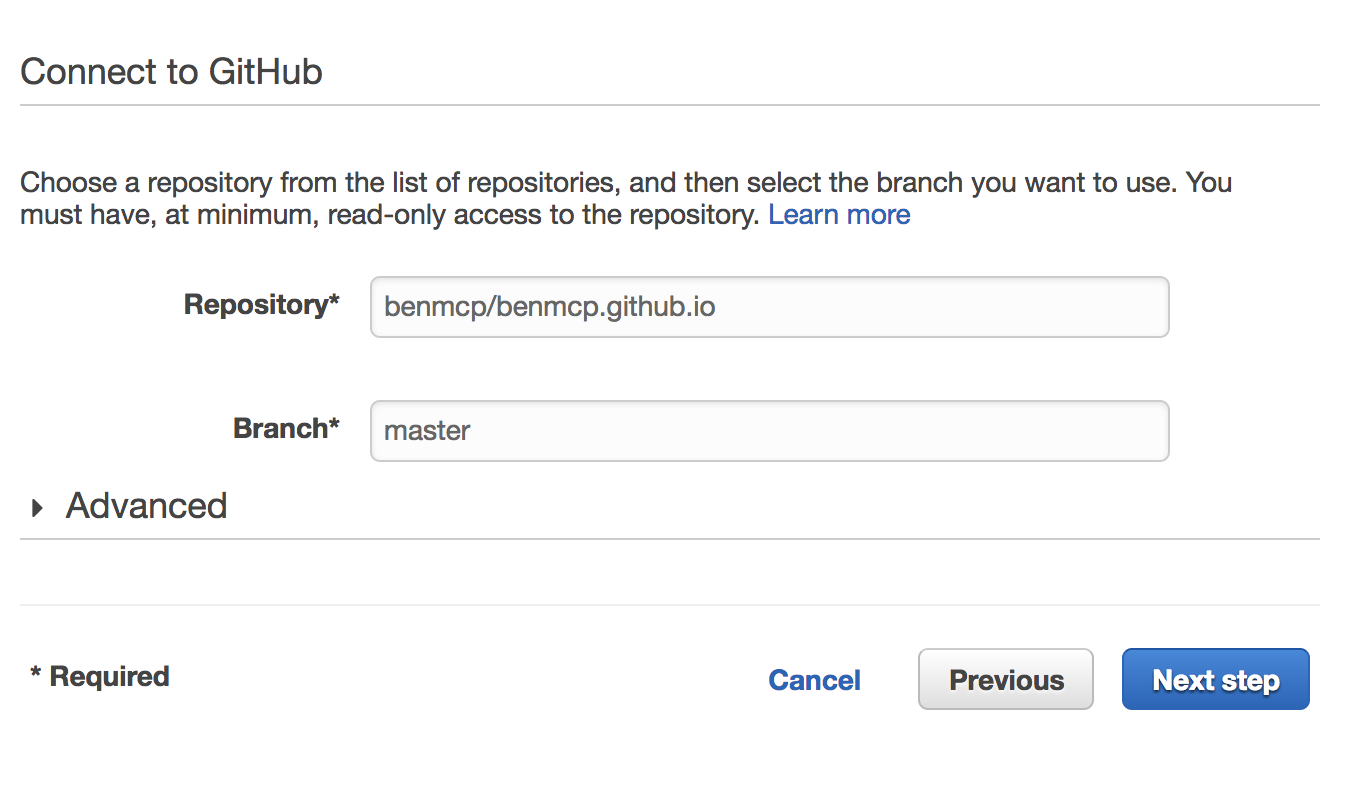
3.2 Select a source (GitHub) and click Connect to GitHub.
Then chose your repo and the branch you want to act as the source and click Next Step.
3.3 Choose a Build Provider
For the Build Provider chose CodeBuild and give the project a name:
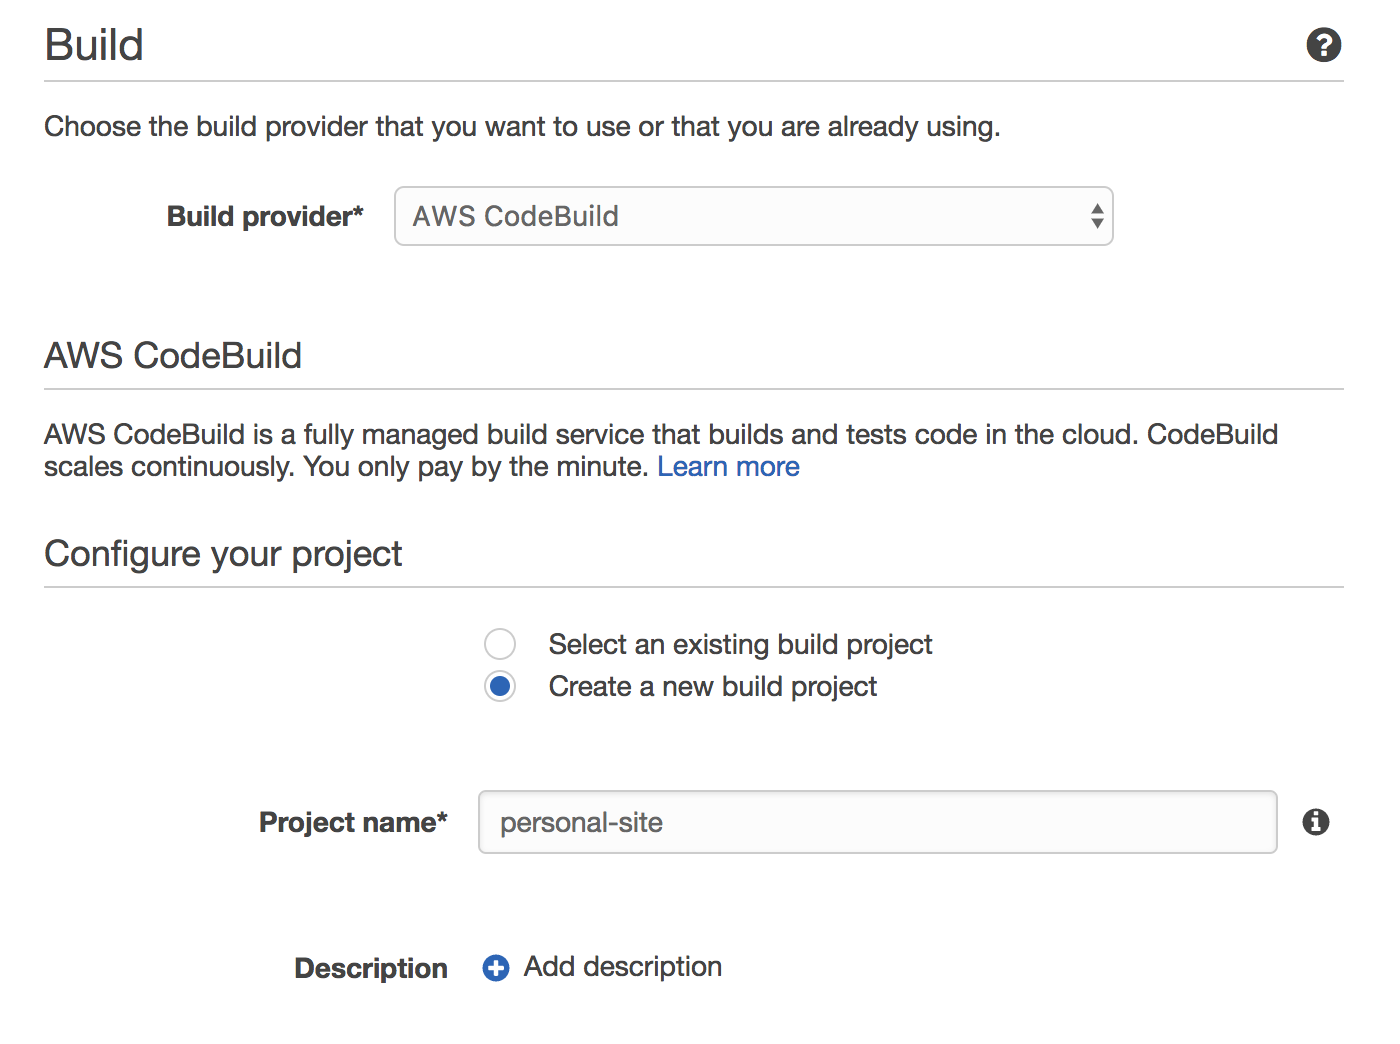
Select Create a new build project and configure it to Ubuntu OS with Ruby (> 2.2.5) runtime (2.2.5 is the min support for Jekyll at the time of writing).
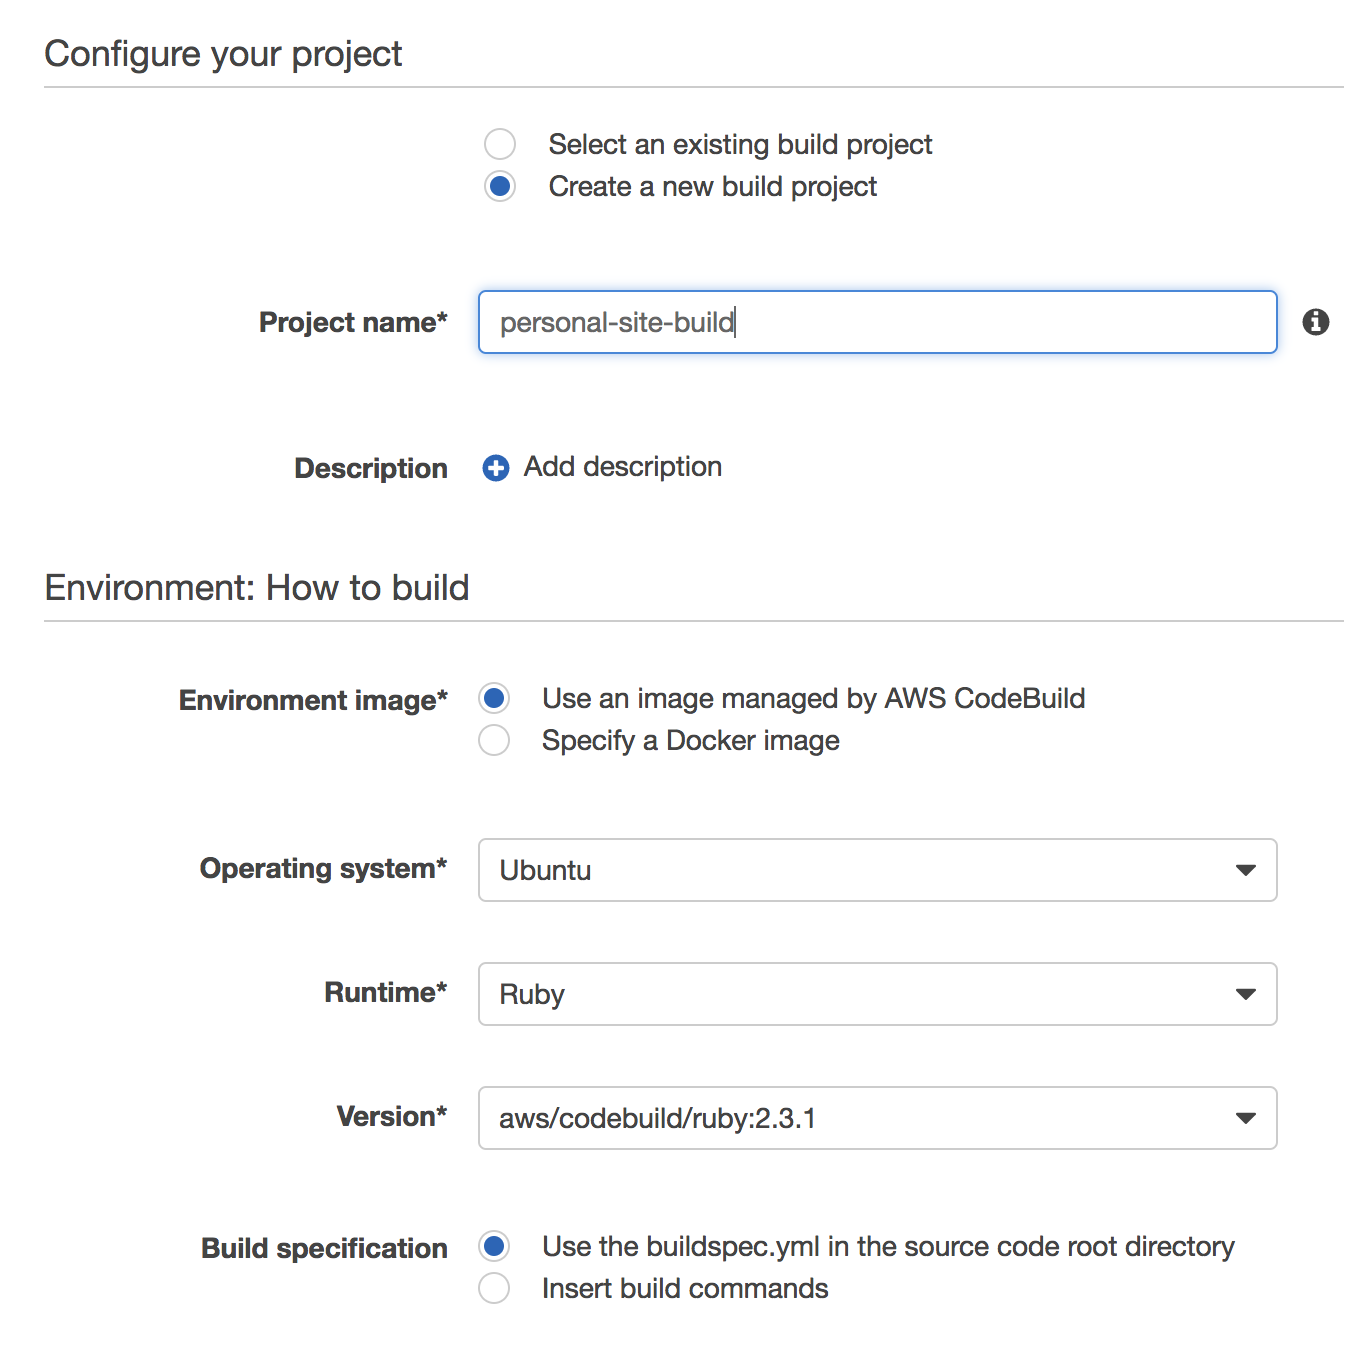
Leave the rest of the page as is and click Save build project. This will save your build settings. Once the page has refreshed, Select the build project you just created and click Next Step.
Now, we haven’t finished entirely with our build. When using CodeBuild, our repo needs to contain a buildspec.yml file in the root directory to tell CodeBuild what to do. Here is a simple buildspec.yml file:
version: 0.1

phases:
  install:
    commands:
      - gem install jekyll jekyll-paginate jekyll-tagging kramdown jekyll-sitemap
  build:
    commands:
      - echo "******** Building Jekyll site ********"
      - jekyll build
      - echo "******** Uploading to S3 ********"
      - aws s3 sync _site/ s3://www.benmcphail.com/
This is essentially doing 3 things:
- Installing all the Jekyll plugins that you need
- Running
jekyll buildto compile our site - Running
aws s3 syncto copy the files across the allocated bucket
More information about how to create and manage a build spec can be found (here)[http://docs.aws.amazon.com/codebuild/latest/userguide/build-spec-ref.html] and (here)[http://docs.aws.amazon.com/codebuild/latest/userguide/samples.html].
3.4 Code Deploy
Next, for the Deployment provider, select No Deployment and then select Next step.
Why no deploy?
Because our site is relatively simple/static, we can deploy the site by running aws s3 sync at the end of our build phase without too much hassle. However, for more complex sites it is recommended to split out these stages between both CodeBuild and CodeDeploy.
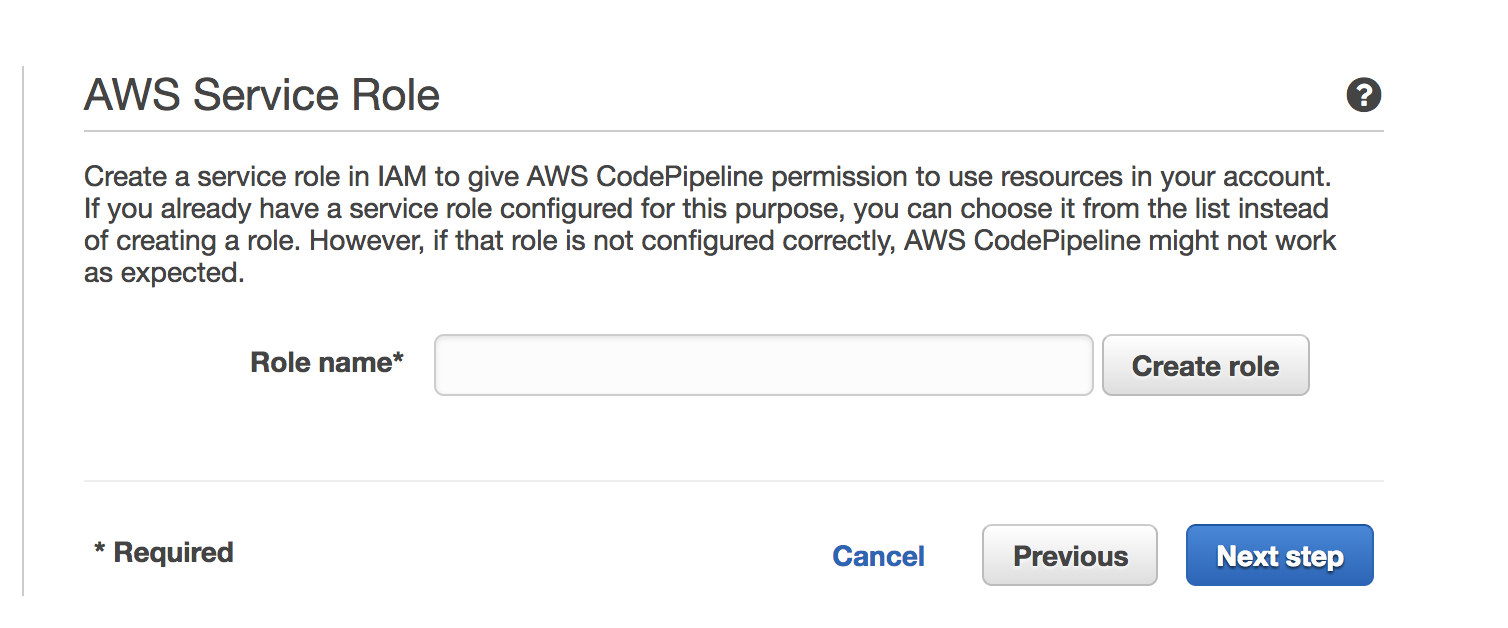
3.5 Create a Service Role
Finally, we have to create a Service Role (or use a pre-existing role if you have one). This essentially give CodePipeline the necessary permissions to interact with the other various AWS services (such as S3).
3.6 Review your pipeline and Click Create Pipeline
This will then setup your pipeline and do an initial fetch from your source directory. If all goes well, you’ve got yourself a blog which will build and deploy your blog with every new post that you create!!!
No GitHub Pages for us!
Conclusion
This was relatively straight forward in terms of setting up, but as a site gets more complex, so will with devops. But for the scope of what I wanted to achieved here, it worked perfectly!!
Disclaimer
This post is in part an attempt for me to start writing blog posts. However it is also to help me consolidate the steps I took such that I can refer back to it in the future. Due to this, if I have skipped over som vital steps or rambled in other parts and you wish for additional information, feel free to contact me and I’ll update this post accordingly.